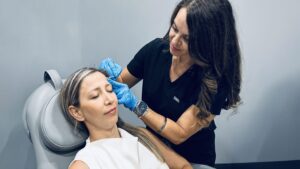
If you’re in the beauty industry, offering lash lift services can be a great way to attract more clients. A lash lift is a simple yet effective treatment that enhances the natural lashes, making them look longer, curlier, and more defined. This treatment is perfect for people who want to avoid the maintenance of eyelash extensions or have allergies to lash adhesives.
By adding lash lifts to your services, you can provide a high-demand beauty treatment that is both quick and cost-effective. This guide will walk you through everything you need to know about lash lifts, including the process, benefits, aftercare, and essential products.
What Is a Lash Lift?
A lash lift is a semi-permanent beauty treatment that curls and lifts natural eyelashes from the base, creating a more open and defined eye appearance. Unlike eyelash extensions, which involve attaching artificial lashes, a lash lift works with the client’s natural lashes. The results can last up to two months, eliminating the need for daily curling or heavy eye makeup.
Step-by-Step Lash Lift Process
If you’re considering offering lash lifts to your clients, it’s important to understand the proper technique. Below is a step-by-step guide to performing a lash lift safely and effectively.
1. Assessing the Client’s Lashes
Before starting the procedure, examine the client’s lashes to determine their length, thickness, and overall condition. Make sure their lashes are clean and free from any makeup, oils, or dirt. This will help the lifting solution work more effectively and prevent any uneven results.
2. Preparing the Eye Area
Place eye pads over the client’s lower eyelids to protect them during the procedure. Smooth them out carefully so they stay in place. Then, position a silicone pad or shield on the upper eyelid just above the lash line. This pad will help shape the lashes into the desired curl. Ensure there are no wrinkles or creases in the silicone shield.
3. Applying the Lash Adhesive
Use a small brush or applicator to apply lash adhesive to the back of the silicone pad. Then, carefully brush the client’s lashes upward, pressing them onto the pad to ensure they stay in place. This step is crucial for achieving a smooth and uniform curl.
If you have newer silicone shields that don’t require glue, you can skip this step, making the process even easier.
4. Applying the Lifting Lotion
Once the lashes are secured, apply the lifting lotion to the middle section of the lashes. Avoid applying too close to the roots or tips, as this can lead to over-processing. The processing time varies based on the thickness and health of the lashes but typically ranges from 9 to 14 minutes.
For clients with stronger, thicker lashes, processing time should not exceed 15 minutes. It’s also a good idea to conduct a patch test 24 hours before the treatment to check for any allergic reactions.
5. Applying the Setting Lotion
After removing the lifting lotion with a clean applicator, apply the setting lotion in the same manner. This lotion helps hold the curl in place. The processing time for the setting lotion is slightly shorter than the lifting lotion.
6. Removing the Silicone Pads
Once the setting lotion has done its job, carefully remove the lashes from the silicone pad using a gentle brush or applicator. If any lashes remain stuck, use a nourishing lotion to release them without pulling or damaging them.
Make sure to clean the eyelid thoroughly if you used lash adhesive so that no residue is left behind.
7. Tinting the Lashes (Optional)
If the client wants darker, more defined lashes, you can apply a lash tint. The tint should be applied before removing the silicone pads to ensure even coverage. Leave the tint on for about 5 minutes, then gently remove it using a clean cotton swab or bamboo applicator.
8. Applying Keratin Treatment
Once the lashes are clean, apply a keratin-based nourishing lotion. This helps strengthen and condition the lashes, preventing them from becoming brittle after the lift. Let the lotion absorb for a few minutes before removing any excess product.
9. Final Touches and Aftercare Advice
Now that the lash lift is complete, advise the client on how to care for their lashes. Proper
aftercare ensures long-lasting results.
Lash Lift Aftercare Tips
To maintain their beautiful new lashes, clients should follow these simple aftercare instructions:
- Avoid getting lashes wet for the first 24 hours.
- Refrain from rubbing or touching the lashes.
- Use an oil-free cleanser to clean the eye area.
- Avoid using oil-based makeup removers for at least 48 hours.
- Consider using a lash serum or conditioner to keep lashes hydrated.
- Clients can wear mascara after 48 hours if they wish.
By following these guidelines, clients can enjoy their lifted lashes for weeks without worrying about damage or early fading.
Benefits of a Lash Lift
Offering lash lifts in your salon or spa provides several benefits to both you and your clients.
1. Natural Look
Unlike lash extensions, a lash lift enhances the client’s natural lashes, giving them a more subtle, elegant look.
2. Long-Lasting Results
A lash lift can last up to 6-8 weeks, reducing the need for daily maintenance.
3. Low Maintenance
Once the initial 24-hour aftercare period is over, clients can go about their normal routine with minimal upkeep.
4. Quick and Easy Treatment
A full lash lift appointment usually takes less than an hour, making it a convenient option for both clients and technicians.
5. Safe and Non-Damaging
When performed correctly by a trained professional, a lash lift does not damage the natural lashes.
Lash Lift Products You Need
To offer the best results, it’s important to use high-quality lash lift products. Here are some essentials:
- Silicone Lash Lift Rods – Soft and flexible to provide a comfortable fit on the eyelid.
- Lash Lift Adhesive – Helps secure lashes to the silicone pads during treatment.
- Lash Lift Tools – Used for separating and positioning the lashes.
- Lifting and Setting Lotions – These solutions shape and hold the curl in place.
- Keratin Nourishing Lotion – Strengthens and hydrates the lashes after the lift.
- Lash Tint (Optional) – Enhances the depth and color of the lashes for a more dramatic effect.
Frequently Asked Questions
Who Can Perform Lash Lifts?
Lash lifts should only be performed by trained professionals who have completed a certified lash lift course. Proper training ensures safe application and beautiful results.
Can a Lash Lift Damage Natural Lashes?
No, as long as the procedure is done by a trained technician using high-quality products, a lash lift does not harm natural lashes.
Can I Do a Lash Lift at Home?
No, it is not recommended to perform a lash lift on yourself. The process requires precision and professional products, so it’s best to visit a trained lash technician.
Final Thoughts
A lash lift is an excellent way to enhance natural lashes without the hassle of daily curling or extensions. If you’re in the beauty industry, offering this service can attract new clients and boost your business. By using high-quality products and following the correct procedure, you can provide a safe and effective treatment that keeps clients coming back for more.
Are you ready to start offering lash lifts? Make sure to invest in the right tools and training, and you’ll be on your way to creating flawless lashes for your clients!


